Metal roofing has become more popular not only with commercial clients but among residential homeowners.
It’s easy to see why – modern metal roofing materials are durable, light, and available in a range of designer hues, providing long-term peace of mind. Thanks to metal roofing’s durability, roofing services can also offer their longest warranties on each system fitted.
There are some considerations to keep in mind. Metal roofing can become searing hot when exposed to prolonged and intensive sunlight. If this isn’t addressed, constant heat and humidity can accumulate beneath your roof, threatening to distort rafters or limit the energy efficiency and lifespan of its installation.
Fortunately, with the use of exhaust vents comparable to other popular roofing systems, this possible issue is pre-emptively addressed.
The benefits of ventilating your metal roof:
We’ve mentioned certain preventative benefits of ventilating your metal roof, but there are proactive benefits worth knowing, too:
Enhanced Energy Efficiency
Insulation is much more effective when you correctly control your ventilation allowances. This means roofing felt and other roofing insulation strategies contribute to reducing your heating bills and improving the environmental efficiency of your home.
Prevention of Condensation
Condensation leads to damp if not properly expelled, which can damage the structural integrity of your roof, lead to poor home health outcomes, and affect any stored items you may have in the attic area.
Over time, it can erode structural elements such as floorboards and even lead to leaks that threaten to damage electronics, or mold and mildew. Correctly implemented ventilation ensures even humid air is adequately distributed outside of your roof.
Improved Indoor Comfort
Put simply, roof ventilation ensures prolonged heat exposure won’t aggressively heat the space it covers. This means that even converted attic spaces remain livable with a metal roofing system.
Structural Integrity Maintenance
Integrating ventilation as a solution now is cleaner, better, and more reliable than retroactively trying to fix ventilation issues later down the line. In most cases, roofing experts will recommend capable ventilation when installing your metal roof.
Improved Air Quality
Ventilation contributes to your other air flow and filtering preparations that help you enjoy a liveable and breathable space even in humid climates. This is especially important for infants and the elderly.
Enhanced Property Value
Well-implemented metal roofing looks great, is easy to clean, and shows a prolonged household lifespan. Additional ventilation showcases a pre-emptive approach to structural integrity, which improves the general valuation of your household. You may also benefit from more favorable insurance premiums as the environmental compliance of your house is assured.
Easy Operation
Typically, you won’t have to “turn on” your vent after it’s been installed because ridge, soffit, and gable vents tend to be what we call passive ventilation systems. In other words, they rely on natural forces like wind and temperature differentials, as well as the useful tendency of heat to rise, to ensure ventilation and airflow work appropriately.
While you’ll need to make sure the structural soundness of your vent remains and inspect for any failings of the airtight seal, you won’t need to service electronics. Even “whirligig” vents that spin around use the wind in their turbine-like design to ventilate, most often they’re not being powered by a specific electrical system.
Assessing & preparing the roof for ventilation:
Assess roof readiness
Before beginning your installation, it’s essential to assess your roof from top to bottom. Any damage, distortion, or warping may require repair or even full replacement. You should also make certain the roof structure itself can support the ventilation systems’ weight and dimensions.
A competent roofer will be able to help you with this process. Remember that if your roof doesn’t have a sub-roof or structural support system, any added weight could cause potential safety hazards or damage. It’s important to only progress when you’re certain of the dimensions and structural integrity needed.
Understand the sealing process
The sealing process is a critical first step. Apply tar with a meticulous approach, focusing on achieving a water and air-tight seal – this will ensure your ventilation remains the only pathway for air to escape.
Apply three thin layers to specific spots throughout the installation, curating a final seal that will offer an airtight and watertight result. Remember to be moderate with your tar usage, less is often more if you hope to achieve a neat and correctly layered outcome.
Understanding the dynamics of airflow
Remember that hot air rises, which is what makes roof ventilation work in the first place. That means the intake vents at the bottom of the roof and exhaust for hot air near the top of the roof are essential. A good seal ensures the airflow takes your pre-prescribed path, instead of leaking through an improper seal and structurally influencing your system. This will also help you decide exactly where to place the air vents for maximum ventilation coverage.
Understand the different ventilation types
There are multiple types of vents worth considering. The two main options are intake vents and ridge ventilation vents. Let’s discuss their differences, below:
Intake Vents
The typical location for intake vent installation is in the soffit beneath the roof eaves because it is the lowest point on the roofing system. Cutting holes in the soffit board and covering them with louvered vent panels is an antiquated but still effective technique for ventilating the soffit.
Remember that the size of your roofing system will determine just how many separate vents are needed. Modern roofing contractors will commonly use perforated soffit during new constructions, allowing for a continuous intake vent throughout the length of the soffit. This means that exhaust ventilations can be placed in the most convenient and structurally sound location because the airflow dynamics, as discussed above, are already perfected.
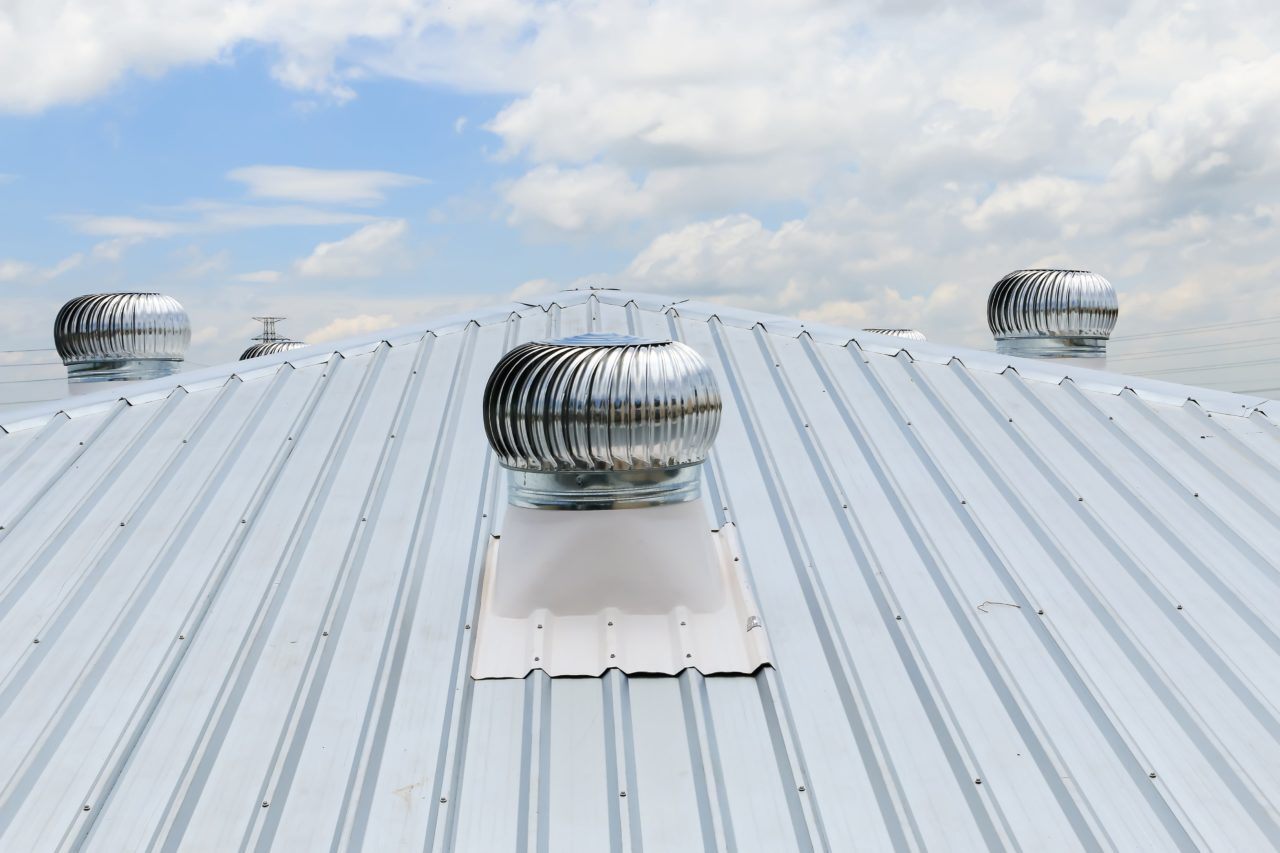
Ridge Ventilation
If your attic is finished and the roofing system already installed, ventilation is a little more difficult yet remains achievable and necessary.
Airflow enters through soffit vents, moves upward through each rafter space, and exits through a ridge vent at the roof peak.
To allow hot air to escape, special metal ridge caps are installed along the length of the roof ridge. These caps have a narrow perforated strip that is concealed by a flap of roof-matching metal. Fortunately, those caps aren’t visible to the untrained eye which means your roofing system’s visual identity is unaffected.
Installing your exhaust vents: a step-by-step guide:
Preparing your roof area
First and foremost, preparing the roof area is essential. Measure and mark the vent locations on the roofing surface, ensuring that appropriate spacing and underside ventilation pathways are considered. You can use the vent body as a template to mark out the kind of incision you need, chalk can be used but markers often work better on metal roofs. Remember the old adage of measuring twice and cutting once, and you’ll ensure a smooth installation.
Make the cuts and apply the tar seal
Using a skilled saw and ensuring you’re firmly fixed in position and safe, cut the market area until it provides clear access to the attic’s interior. After removing the debris from the sawing, apply a thin layer of tar to the cut edges to ensure that the first placement of your vent body is applied.
Secure your vent in place
Note that this is often a two-man job given the size of a ventilation unit. Position the vent in its designated and marked space and, if necessary, drill those starter holes to secure it using the screws provided in the installation kit where required. This will hold it in place as the first contact with the seal tar is made.
Layering the tar
As we mentioned above, multiple layers of tar, ideally three, are necessary for sealing the ventilation unit to the roof. Apply your second layer of tar around the vent’s edge to fill any exposed areas between the vent’s lip and the metal roof. This will help to support the initial seal while also ensuring watertight and airtight proofing. Remember our insight above that less is often more when applying tar, so apply it evenly with a tar brush.
Seal the exhaust vent underside
Now comes the third layer of the tar. Head underneath and apply tar to the exposed underside of the cut hole from the attic area. You may also need to install cover plates depending on the type of vent you use, and these can be easily implemented, especially with any additional screws you might have on hand.
In moderate temperatures, tar will dry in a few hours, but it’s often best to give a full 24 hours before you make any adjustments or clean the roof just to ensure the tar has set correctly and the vent is correctly in place.