

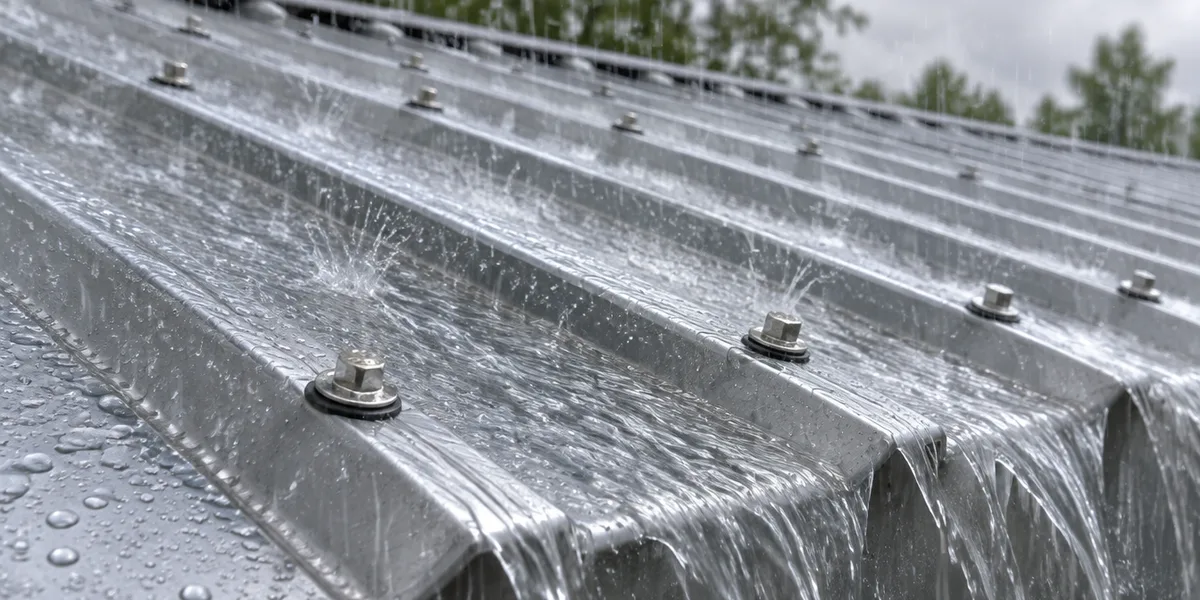
A metal roof leaks at its details, almost never through the panel. In Florida the usual suspects, in the order we see them, are fasteners, pipe boots, panel laps, flashing, ridge closures, and the eave. Before you chase any of them, make sure the water is rain and not condensation.
Key takeaways
- Water dripping on a cool, dry morning is condensation, not a leak.
- Screws with cracked or lifted EPDM washers are the number one leak source on exposed-fastener panels.
- Under FBC Section 1507.4.2, lapped panels need a 3:12 slope with no lap sealant or 1/2:12 with it.
- A few screws or a pipe boot is a fair homeowner job. Re-laying panels is contractor work.
- A 29-gauge roof with washers failing across the field at year 15 is usually a replacement conversation.
First, make sure it is a leak
The late-fall call we get most often: a drip from a pole barn ceiling, no rain in three days, and the owner sure a screw let go. Usually no screw let go. Warm, damp air inside met a panel that cooled overnight, and water formed on the underside and dropped off a purlin or screw tip.
Condensation shows up on clear, cool mornings, spread out rather than at one point, and it is worst on open-framed barns and carports in Putnam and Volusia where the panel sits on bare purlins with no underlayment or insulation to keep damp air off the steel. The fix is ventilation and a barrier, not sealant and not screws. We covered it in why your metal roof sweats.
A real leak tracks the rain. It is often worse when wind drives rain from one direction, so note which side the weather came from before the stain dries, because that one detail narrows the search more than anything else you can tell a roofer.
The eight places water gets in, in the order we check them
This is the order we walk through when a contractor calls the Welaka counter with a leak they cannot find.
1. Fasteners
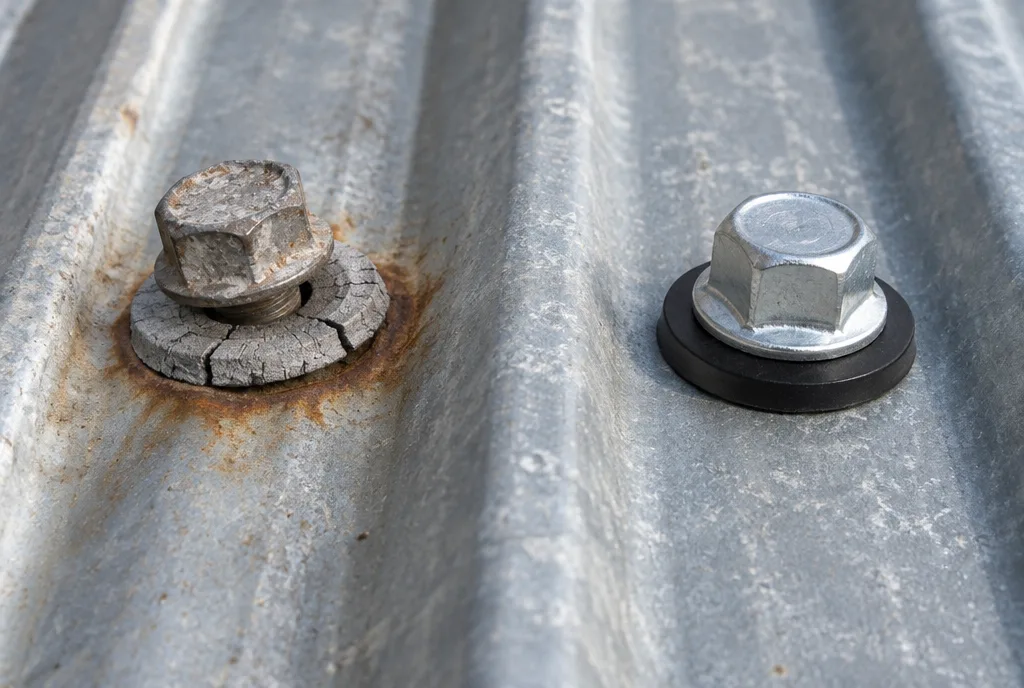
An exposed-fastener roof has thousands of holes in it by design, each sealed by an EPDM washer under the screw head. Five ways the washer stops sealing:
- Backed out. Steel grows and shrinks with heat every day, and over years that works screws loose. Binoculars from the ground will show heads sitting proud of the rib.
- Over-driven. An impact driver with no clutch crushes the washer past the cap.
- Under-driven. The washer never compressed.
- Missed the framing. Common on roof-overs where furring strips were not marked.
- UV-cooked washers. Florida sun hardens rubber until the washer turns gray and chalky, cracks, and shrinks from the head. A rust ring around the screw is the giveaway.
The fix is a new screw, not a tightened old one. Re-driving the original screw into a hole it has already stripped buys you one season at best, so step up a shank diameter so the threads bite fresh wood, and on steel purlins use a self-driller rather than a wood-grip. Match the fastener in the panel’s approval, as Section 1507.4.4 requires. Our post on how long screws last on a metal roof covers washer aging. For four bad screws on a shed, any farm-store screw with a good EPDM washer will do.
2. Pipe boots and penetrations
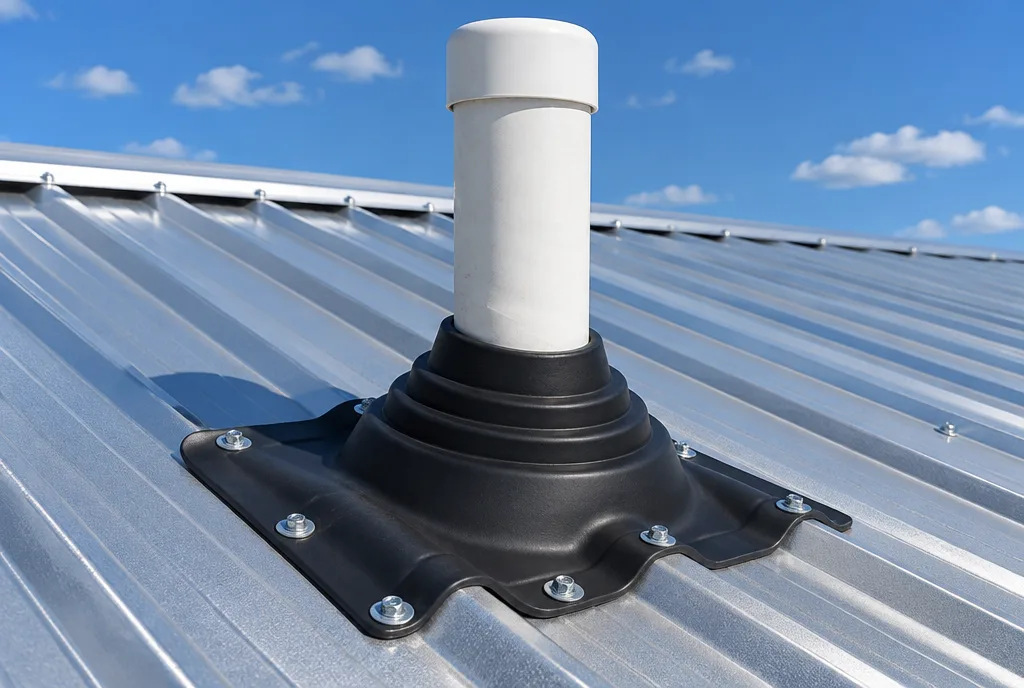
Plumbing vents, flues, dish mounts, and solar standoffs all depend on a flexible seal that ages in the sun. A boot fails three ways: the cone cracks where it grips the pipe, the sealant under the flange lets go, or the boot was set on the ribs with no flat base to seal to. Hot flues add a fourth: a standard EPDM boot cooks and splits; only a high-temperature silicone boot holds up.
The stain sits right under the vent, so this one is easy to confirm. The fix is a new boot sized to the pipe, with the base flange bedded in butyl and screwed down on the flats rather than the ribs, and the uphill edge of the flange worked under the panel so water sheds over it instead of into it. Our pipe boots guide shows the order of layers.
3. Side laps and end laps
The side lap is where the edge of one panel rides over the next; on Super Pro 5 Rib that is one of the 9-inch ribs. An end lap is where two panels meet along the run, common on long barns.
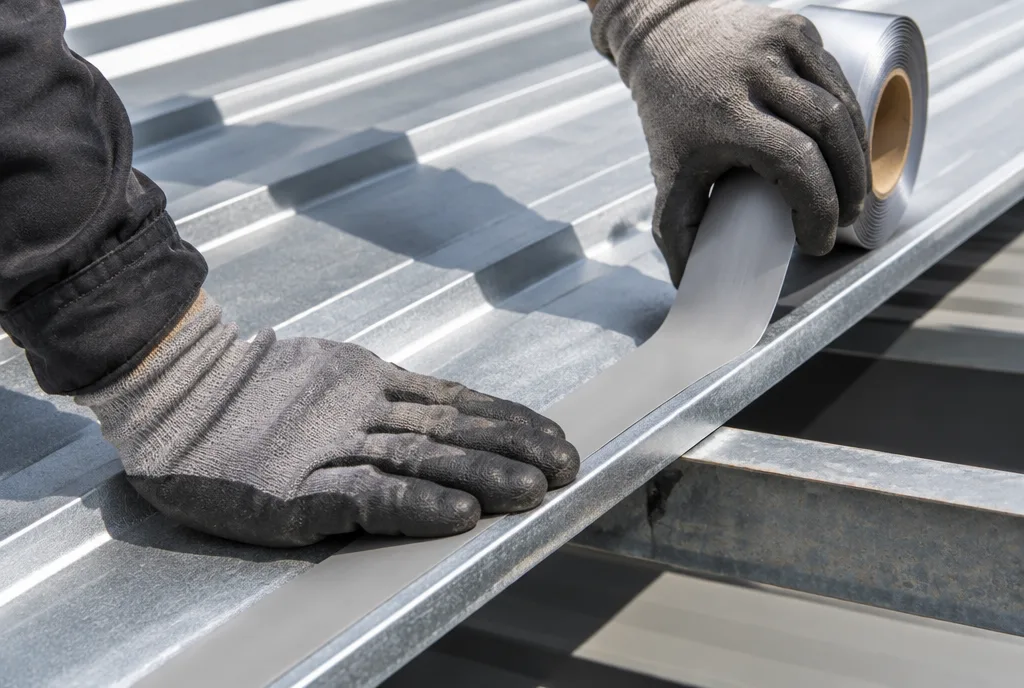
Laps leak for four reasons: no butyl tape on a slope that needed it; laps facing into the prevailing weather, so wind pushes rain under the overlap; an end lap too short or dry; or skipped lap screws.
Section 1507.4.2 of the 2023 Florida Building Code sets the minimum slope for lapped, nonsoldered panels at 3:12 with no lap sealant and 1/2:12 with lap sealant applied. Standing seam gets down to 1/4:12. On a lean-to porch, a mobile home roof-over, or any run under 3:12, butyl in every side lap is the code minimum, not an upgrade.
Lap direction matters as much as sealant: start panels on the end of the roof away from the prevailing wind so every lap faces downwind. The layout is in how to overlap corrugated metal roofing; the butyl tape we sell is the roll our contractors use.
A lap leak stains in a straight line down the run rather than at a screw. The repair means backing out the lap screws, lifting the overlap, cleaning both faces, laying tape, and re-fastening with new screws, which on a short porch is a Saturday and on a 40-foot barn run is a full re-lay.
4. Flashing: walls, chimneys, transitions, and valleys
Water does not leak through flashing; it leaks past it. The failures we see most: sidewall flashing caulked to the face of the stucco instead of tucked behind it; headwall Z flashing with no closure under it, so wind drives rain up the ribs and over the top; transition flashing cut too short for the lower panel’s rib height; valley metal set without a cleat, so panel edges lift; and valleys choked with pine needles.
Fixing any of these means lifting panels and trim, which is why they get surface-caulked so often, and why the caulk, which was never meant to carry the water a bent piece of metal should be carrying, fails within two Florida summers. Our post on flashing a metal roof to a wall shows the layers in order, and if the trim itself is wrong, we bend Z flashing, transition, valley, and valley cleat in Welaka.
5. Ridge and hip closures
The gap under the ridge cap between ribs has to be filled with a closure strip cut to the panel profile. Missing, crushed, or UV-rotted closures let wind-driven rain, wasps, and debris into the attic, and the stain runs along the ridge line on the windward side. Lift the cap, replace every closure, re-fasten with new screws.
6. Eave, drip edge, and gutter apron
Leaks at the bottom of the roof rot fascia rather than staining a ceiling, so they go unnoticed longer: an eave drip too short, so water wicks back onto the fascia; no gutter apron, so water runs behind the gutter; panels cut short at the eave; no eave closure; and gutters packed full.
The fix is a proper eave drip with the gutter apron under the underlayment and over the gutter back. The code’s shingle-roof rule in FBC-R R905.2.8.5 is 12 inches on center, tightening to 4 inches where design wind speed reaches 110 mph or the roof is over 33 feet; metal eave trim follows the manufacturer’s details instead, and we treat that shingle spacing as the floor for our drip edge. A drip edge tacked every 2 feet is a leak and an uplift problem either way.
7. Slope and panel-length problems
Some roofs were never going to work: a 5 Rib panel on a 1:12 porch with no lap sealant, or sagging purlins that leave a flat spot where water ponds against a lap.
Panels installed in a configuration their approval does not cover belong here too, such as a plywood-only profile on open purlins; any panel’s approved deck, gauge, and fastening is in the Florida Product Approval search.
Oil canning, waviness in the flat of a panel, is not a leak.
8. Storm damage and roof-overs done wrong
After a storm, check the edges first. Lifted panel ends at the eave and rake, gable trim peeled back, and limb punctures are what we see after every named storm, because wind loads a roof hardest at its perimeter and a water oak drops its heaviest limbs on the side the wind came from. The Atlantic season runs June 1 through November 30. Metal over shingles, done wrong, leaks two ways: panels screwed through shingles with no furring strips, or strips with no underlayment, so every missed screw reaches the deck.
What you can fix, what needs a contractor, and when the roof is done
OSHA requires fall protection for roofing workers 6 feet or more above a lower level, and its roofing worker guide treats the roof edge as the most dangerous spot on the job. That rule binds employers, not homeowners, but take the hint: a wet metal roof is slick as ice, so wait for it to dry.
Reasonable to do yourself, if you are comfortable up there: a handful of screws, a pipe boot, closures on a single story.
Call a licensed roofer for anything that means lifting panels or trim: re-laying a run for lap sealant, rebuilding wall or chimney flashing, or any leak that shows up far from where water enters. Check the license at the DBPR license search before you sign.
Start the replacement conversation when a 29-gauge roof is 15 or more years in and washers are failing across the field, when rust shows at every lap and cut edge, or when decking is soft under a leak that ran for years. Under F.S. 627.7011, a roof 15 years or older needs an inspection showing five years of useful life left before an insurer is barred from dropping you over its age. A roof with fastener failure across the whole field will not pass that inspection, no matter how good the panels under the washers still look.
That said, a tired roof on a hay barn you do not insure can be re-screwed and run for years.
How a contractor finds a leak, and how to help them
Water runs down the underside of a panel, along a purlin, and drops 10 feet from where it came in, so chasing a leak from inside is guesswork. The reliable method is a hose test:
-
Start on a dry roof at the eave below the stain.
-
Run a garden hose, no nozzle, on one section for 10 minutes while a helper watches inside.
-
Move up one lap or one detail at a time. Never spray uphill, or you will push water under a lap that does not leak in rain.
-
When the drip starts inside, mark the spot with tape and keep going; there may be more than one.
-
Fix every marked spot and test again.
If the repair means replacing panels, bring us the original panel name and color, because if the roof is Super Pro 5 Rib in 29 gauge we can run matching panels on the same rollformer within 24 to 48 hours, and a partial re-lay beats tearing off a roof that is sound everywhere but one run. If you do not know the panel, a photo of the rib profile and a tape across the width is enough.
What drives the cost of a leak repair
We are not going to print a dollar range, because anyone quoting one without seeing the roof is guessing. What moves the number: access and pitch; how far the leak sits from the entry point, which decides how many panels come up; and whether panels come up at all, because a re-lay is labor. Most roofers carry a minimum service call, so three screws cost what thirty do.
FAQ
Why is my metal roof leaking at the screws?
The EPDM washer under the screw head has stopped sealing. In Florida that usually means UV cracked the washer, the screw backed out as the panel expanded and contracted, or it was over-driven at install. Replace each one with a larger-diameter screw and a new washer; do not re-tighten the old one.
Can a metal roof leak at the seams?
Yes. On exposed-fastener panels the side lap leaks when butyl tape was skipped on a low slope, when laps face the prevailing wind, or when lap screws were left out. On standing seam, it usually means a clip or seam was never fully engaged.
How do I find where my metal roof is leaking?
Rule out condensation first by checking whether the drip follows rain, then do a hose test from the eave up, one section at a time, with someone watching inside. Water travels along the underside of panels and purlins before it drops, so the entry point is almost always uphill of the stain.
How much does it cost to fix a leaking metal roof in Florida?
It depends on pitch, access, how many panels have to come up, and whether trim or decking needs replacing, which is why we do not print a range. A few screws and a boot is a minimum service call; a re-lay is priced by the roof. Get two licensed quotes.
Will roof sealant stop a metal roof leak?
Sometimes, briefly. Gun sealant over a cracked washer or a lap edge holds a season or two before Florida sun breaks it down. It is a fair stopgap on a shed you plan to re-roof; on a house, treat it as a patch and fix the fastener, boot, or lap properly.
Bring us the panel and we will match the parts
Bring a photo and the panel profile to the counter at 710 3rd Avenue in Welaka, or call 386-222-6779, and we will match screws, closures, boots, and butyl tape to your panel. For a partial re-lay, email sales@rpsmetalroofing.com with the original panel name, gauge, and color for a quote.